Monday, August 31, 2009

A Pattern For Control-Specific Context Menu on Right-Click in Silverlight

There are a lot of good examples online, about how to make Silverlight applications respond to mouse right-clicks. So, I am not going to rehash it in detail here. Instead, I will attempt to describe a pattern that I found useful, when I implemented right-click context menus for controls on a page. The requirements for the functionality are:

1. There is a unified and consistent way to display context menu.
2. The control provides the data for the display (image / text / data).
3. The control is responsible for responding to the user selection.

Here is a demo application that uses the pattern I describe. Just as before, there is something about the script on the silverlight live site that doesn't make it work right for firefox. Works fine in IE, and when hosted on another site, on Firefox too. Since the app works ok when code is compiled and run on any browser, I am not going to sweat it.


Link to app here: http://silverlight.services.live.com/invoke/105917/Control-Specific%20Right-click%20Context%20Menu%20Demo/iframe.html

The codebase can be downloaded here: http://www.filefactory.com/file/ah498ca/n/ContextMenuDemo_zip


The main component of the functionality is the right-click interceptor class, which interacts with the DOM and intercepts the right mouse down, mouseclick, oncontextmenu events. Make sure your app is set as "windowless". All these aspects, it shares with other examples online. We will come to some extra functionality of this class later. The RootVisual of the app has an instance of this class.

  1         private void OnMouseDown(object sender, HtmlEventArgs e)
  2         {
  3             if (e.MouseButton == MouseButtons.Right)
  4             {
  5                 foreach (FrameworkElement ei in _ElementsToIntercept)
  6                 {
  7                     if (IsPointWithinBounds(new Point(e.OffsetX, e.OffsetY), ei))
  8                     {
  9                         e.PreventDefault();
 10                         if (MouseRightButtonDown != null)
 11                             MouseRightButtonDown(this, e);
 12                         RightClickedControl = ei;
 13                         _IsButtonDown = true;
 14                         break;
 15                     }
 16                 }
 17             }
 18         }
 19         private void OnMouseUp(object sender, HtmlEventArgs e)
 20         {
 21             if (e.MouseButton == MouseButtons.Right && _IsButtonDown)
 22             {
 23                 e.PreventDefault();
 24                 _IsButtonDown = false;
 25                 if (MouseRightButtonUp != null)
 26                     MouseRightButtonUp(this, e);
 27             }
 28         }
 29 
 30         private void OnContextMenu(object sender, HtmlEventArgs e)
 31         {
 32             foreach (FrameworkElement ei in _ElementsToIntercept)
 33             {
 34                 if (IsPointWithinBounds(new Point(e.OffsetX, e.OffsetY), ei))
 35                 {
 36                     e.PreventDefault();
 37                     break;
 38                 }
 39             }
 40         }
 41 


The second component is the "ISupportCOntextMenu" interface.

  1     public interface ISupportContextMenu
  2     {
  3         void HandleContextMenuClick(object sender, ContextMenuClickEventArgs e);
  4         List<ContextMenuItemInfo> GetContextMenuContent(HtmlEventArgs e);
  5     }

Any control that needs a context menu needs to implement this interface, and the control needs to be registered with the rootvisual. Thre registration process brings us to the extra stuff in the interceptor. Interceptor maintains a list of references to ISupportContextMenu. Registration just adds to this list. When an interceptable event happens, the interceptor checks to see if it happened within the bounds of any of the items in the list (Big part of the whole thing).

  1         public static bool IsPointWithinBounds(Point p, FrameworkElement element)
  2         {
  3             try
  4             {
  5                 GeneralTransform gt = element.TransformToVisual(Application.Current.RootVisual as FrameworkElement);
  6                 Point cp = gt.Transform(new Point(0, 0));
  7 
  8                 if (p.X <= cp.X + element.ActualWidth && p.X >= cp.X && p.Y <= cp.Y + element.ActualHeight && p.Y >= cp.Y)
  9                     return true;
 10                 else
 11                     return false;
 12             }
 13             //if the control has been cleared from parent 'transformtovisual' will throw an error.
 14             //In that case return false
 15             catch { return false; }
 16         }

If it did, then it asks the control to provide data for the context menu (GetContextMenuContent()).

  1 //From instantiating control:
  2 
  3         public Home()
  4         {
  5             InitializeComponent();
  6             ((MainPage)App.Current.RootVisual).RegisterControlWithContextMenu(Ctx1);
  7             ((MainPage)App.Current.RootVisual).RegisterControlWithContextMenu(Ctx2);
  8         }
  9 
 10 //From RootVisual:
 11 
 12         public void RegisterControlWithContextMenu(ISupportContextMenu control)
 13         {
 14             _RightClickIntrcpt.AddElementToIntercept(control);
 15         }
 16 
 17 //From Interceptor:
 18 
 19         public void AddElementToIntercept(ISupportContextMenu fe)
 20         {
 21             if (!_ElementsToIntercept.Contains(fe))
 22                 _ElementsToIntercept.Add(fe);
 23         }


This brings us to the third component: ContextMenuItemInfo.

  1     public class ContextMenuItemInfo
  2     {
  3         public Image Image { get; set; }
  4         public string Command { get; set; }
  5         public Object Tag { get; set; }
  6     }
You can provide a list of items, each of which contains an image (optional), text, and any kind of data that makes sense in the context (optional) to the interceptor. The text and data tag is passed back to the control as a KeyValuePair if user click on it.

The third component is a popup control that holds a list box. This is in the root visual. The RootVisual responds to an event raised by the interceptor and takes the  List of ContextMenuItemInfo, populates the listbox, moves the popup to where the mouse is, and displays it. There is a DispatcherTimer and MouseEnter/MouseLeave events that make sure the popup is displayed and hidden in a graceful manner. In the RootVisual:

  1         private void InitializeContextMenuIntercept()
  2         {
  3             InitializeContextMenuTimer();
  4             _RightClickIntrcpt = new ContextMenuInterceptor();
  5             _RightClickIntrcpt.MouseRightButtonUp += new EventHandler<System.Windows.Browser.HtmlEventArgs>(_RightClickIntrcpt_MouseRightButtonUp);
  6         }
  7 
  8         private void InitializeContextMenuTimer()
  9         {
 10             _ContextMenuTimer = new DispatcherTimer();
 11             _ContextMenuTimer.Interval = TimeSpan.FromSeconds(2);
 12             _ContextMenuTimer.Tick += (s, e) => ContextMenu_MouseLeave(null, null);
 13         }
 14 
 15         void _RightClickIntrcpt_MouseRightButtonUp(object sender, System.Windows.Browser.HtmlEventArgs e)
 16         {
 17             ISupportContextMenu cntrl = _RightClickIntrcpt.RightClickedControl as ISupportContextMenu;
 18             if (cntrl != null)
 19             {
 20                 List<ContextMenuItemInfo> mnuContent = cntrl.GetContextMenuContent(e);
 21                 if (mnuContent != null && mnuContent.Count > 0)
 22                 {
 23                     ContextMenuListBox.ItemsSource = from mc in mnuContent
 24                                                      select new ListBoxItem
 25                                                      {
 26                                                          Content = GetContextMenuItemVisual(mc.Command, mc.Image),
 27                                                          Tag = new KeyValuePair<string, object>(mc.Command, mc.Tag)
 28                                                      };
 29                     ContextMenuListBox.MouseLeftButtonUp += ContextMenuListBox_MouseLeftButtonUp;
 30                     ContextMenuPopup.Margin = new Thickness(e.OffsetX, e.OffsetY, 0, 0);
 31                     ContextMenuPopup.IsOpen = true;
 32                     _ContextMenuTimer.Start();
 33                 }
 34             }
 35         }
 36 
 37         FrameworkElement GetContextMenuItemVisual(string command, Image image)
 38         {
 39             StackPanel ret = new StackPanel
 40             {
 41                 Orientation = Orientation.Horizontal,
 42                 Margin = new Thickness(2),
 43             };
 44             if (image != null)
 45             {
 46                 image.Margin = new Thickness(0, 0, 4, 0);
 47                 ret.Children.Add(image);
 48             }
 49             ret.Children.Add(new TextBlock { Text = command });
 50             return ret;
 51         }
 52 
 53 
 54         void ContextMenuListBox_MouseLeftButtonUp(object sender, System.Windows.Input.MouseButtonEventArgs e)
 55         {
 56             if (ContextMenuListBox.SelectedItem != null)
 57                 ((ISupportContextMenu)_RightClickIntrcpt.RightClickedControl).HandleContextMenuClick(this, new ContextMenuClickEventArgs
 58                 {
 59                     ClickedItem = (KeyValuePair<string, object>)((ListBoxItem)ContextMenuListBox.SelectedItem).Tag
 60                 });
 61             ContextMenuListBox.MouseLeftButtonUp -= ContextMenuListBox_MouseLeftButtonUp;
 62             ContextMenuPopup.IsOpen = false;
 63         }
 64 
 65         void ContextMenu_MouseEnter(object sender, RoutedEventArgs e)
 66         {
 67             _ContextMenuTimer.Stop();
 68             ContextMenuPopup.IsOpen = true;
 69         }
 70         void ContextMenu_MouseLeave(object sender, RoutedEventArgs e)
 71         {
 72             ContextMenuPopup.IsOpen = false;
 73             _ContextMenuTimer.Stop();
 74         }


This ensures that a control has total say if it wants a context menu, and if so, what the content should be, and how the application should respond to user selection. I know that a lot of things are not elaborated here, but I am hoping it will make sense when you go through the code. If needed, I can augment this with some diagrams. Let me know.

Monday, August 24, 2009

Mouse DoubleClick in Silverlight

We are implementing a mouse-doubleclick event in the TimeLine Visualizer control, but that is not native to Silverlight. There are a number of code snippets on the web about how to do this, but I think the implementation of the event is nice enough to share here.

The event fires when the mouse is clicked twice within a certain time, and within a certain distance. I think the spatial/temporal tolerances make for a smooth user experience. The code consists of static variables to store the position and time of last mouse-click, and extension methods to compare the current values to the stored values. The code should be self-explanatory (While we are one the subject, can anybody point me to a good online code formatter for blogger? Live Writer refuses to install on my machine which has Windows 7 Ultimate, 32-bit):

1:      #region Mouse Double Click  
2: //initialize to 2 secs back, so event doesnt fire very first time user clicks on control
3: static DateTime _lastClicked = DateTime.Now.AddSeconds(-2);
4: static Point _lastMousePosition = new Point(1, 1);
5: private const double MousePositionTolerance = 20;
6: public static bool IsDoubleClick(this MouseButtonEventArgs e)
7: {
8: bool ret = false;
9: if ((DateTime.Now.Subtract(_lastClicked) < TimeSpan.FromMilliseconds(500))
10: && (e.GetPosition(null).GetDistance(_lastMousePosition) < MousePositionTolerance))
11: {
12: ret = true;
13: }
14: _lastClicked = DateTime.Now;
15: _lastMousePosition = e.GetPosition(null);
16: return ret;
17: }
18: #endregion
19: public static double GetDistance(this Point current, Point other)
20: {
21: double x = current.X - other.X;
22: double y = current.Y - other.Y;
23: return Math.Sqrt(x * x + y * y);
24: }


The consumer code will handle the MouseLeftButtonDown event and examine it to see if it is a double-click, like this:

private void HandleMouseLeftButtonDown(object sender, MouseButtonEventArgs e)

{

if (e.IsDoubleClick())

{
....

Caveat Emptor:
The calling method should make sure that all code paths execute e.DoubleClick().

Take, for instance, a calling method like this:

if (condition1 == true)
{
condition1 = false;
do something;
}
else if (e.IsDoubleClick())
{
Do what you do on doubleclick;
}

Here IsDoubleClick is not called the first time the Mousedown event happens, so the static variables _lastPosition and _lastClicked are not set. Hence, IsDoubleClick will not return true when a true double-click happens.

Hope this helps.

Tuesday, August 18, 2009

A Timeline Visualizer in Silverlight/C#: Part 2

The last post was a primer on consuming the TimeLineVisualizer control. If you want to just use the control as is, that is all you would need. You can customize the appearance by changing the colors and brushes in the xaml of TimeLineVisualizer and TimeLine controls. But, if you are interested in how these controls work, here you go:

Link to code (control and demo): http://www.filefactory.com/file/ah13e8g/n/VisualTimelineDemo_zip

Link to demo: http://silverlight.services.live.com/invoke/105917/TimeLine%20Visualizer%20Demo/iframe.html

TimeLineVisualizer xaml:

<Grid x:Name="LayoutRoot" Background="White">
<
Grid.RowDefinitions>
<
RowDefinition x:Name="TimeLineAxisRow" Height="Auto"/>
<
RowDefinition x:Name="TimeLineObjectsRow" Height="*"/>
Grid.RowDefinitions>
<
Canvas Name="AxisCanvas" Grid.Row="0" Height="50" Margin="0,0,20,0">
<
Line Name="AxisLine" Stroke="#AA000000" StrokeThickness=".2" Canvas.Top="48" Canvas.Left="0"/>
Canvas>
<
ScrollViewer Name="PlotScrollViewer" BorderThickness="0" Margin="0" Padding="0" Grid.Row="1" SizeChanged="ScrollViewer_SizeChanged">
<
Canvas Name="PlotCanvas" SizeChanged="Canvas_SizeChanged" MouseLeftButtonDown="Canvas_MouseLeftButtonDown" MouseLeftButtonUp="Canvas_MouseLeftButtonUp" MouseMove="Canvas_MouseMove" >
<
Canvas.Background>
<
LinearGradientBrush EndPoint="0.457,0.296" StartPoint="0.459,1.296">
<
GradientStop Color="#FFCBCBCB"/>
<
GradientStop Color="#FFFFFFFF" Offset="1.1"/>
LinearGradientBrush>
Canvas.Background>
Canvas>
ScrollViewer>
Grid>


TimeLineVisualizer takes the data in the form of IEnumerable<timelinedata>:

public class TimeLineData : INotifyPropertyChanged

{

private bool _IsHighLighted;


public Brush BackGround { get; set; }

public object DataContext { get; set; }

public DateTime Start { get; set; }

public DateTime End { get; set; }

public string Label { get; set; }

public object ToolTip { get; set; }

public bool IsHighlighted

{

get {
return _IsHighLighted; }

set

{

_IsHighLighted
= value;

if (PropertyChanged != null)

PropertyChanged(this, new PropertyChangedEventArgs("IsHighLighted"));

}

}


#region INotifyPropertyChanged Members


public event PropertyChangedEventHandler PropertyChanged;


#endregion

}


When you set the ITemsSource for the visualizer, you should be able to massage any data into this form using LINQ, if the data has a schedule-like behavior. There is a DataContext property to hang any app-specific data on the timeline object. This will get included in the DetailRequested event if the timeline is selected at the time.

Xaml for TimeLine:

<Canvas Name="RootCanvas" SizeChanged="Canvas_SizeChanged" MouseLeftButtonDown="Canvas_MouseLeftButtonDown" >

<
Border Name="TimeLineBorder" CornerRadius="5" BorderBrush="#BB64789B"

BorderThickness="1" Canvas.Top="0" MouseLeftButtonDown="Border_MouseLeftButtonDown" Background="{StaticResource TimeLineBackground}">

</
Border>

<
TextBlock FontWeight="Medium" MouseLeftButtonDown="Border_MouseLeftButtonDown" FontSize="10" Name="TimeLineTextBlock" HorizontalAlignment="Center" VerticalAlignment="Center">

</
TextBlock>

<
Line Name="BottomBorderLine" Stroke="#FFFFFFFF" StrokeThickness=".1"/>

</
Canvas>


The visualizer just presents the data in the same order as it receives, so user OrderBy if you want to see data in a sequential format top to bottom. For each TimeLineData object, the Visualizer control creates a TimeLine control, and stack them top to bottom in the canvas PlotCanvas.

private void VisualizeItemsSource()

{

//we may change the size of the plot depending on number of elements we have to draw.

//Dont want to fire the size-changed event and redraw stuff, so unhook event handler

PlotCanvas.SizeChanged -= Canvas_SizeChanged;

String[] currHighlight = null;

if (PlotCanvas.Children.Count > 0)

{

currHighlight
= (from tl in PlotCanvas.Children

where

tl
is TimeLine && ((TimeLine)tl).ItemsSource.IsHighlighted

select
((TimeLine)tl).ItemsSource.Label).ToArray();

}

//remove all existing stuff on the plot canvas

PlotCanvas.Children.Clear();

//if the elements can be more than the minimum specified height and still fit into the

//viewport of scrollviewer, do that. Else grow the plotcanvas height to (elementCount * minimumHeight)

PlotCanvas.Height = PlotScrollViewer.ActualHeight;

double totalHeight = PlotCanvas.Height;

double tlHeight = 0;

if (_itemsSource != null)

{

tlHeight
= totalHeight/_itemsSource.Count();

}

if (tlHeight < MINIMUM_TIMELINE_HEIGHT)

{

tlHeight
= MINIMUM_TIMELINE_HEIGHT;

PlotCanvas.Height = _itemsSource ==null?0: MINIMUM_TIMELINE


How an individual TimeLine visualizes it's data:

void VisualizeItemsSource()

{

//make sure we have all the values needed, before attempting to visualize

if (_TimeLineEnd != null && _TimeLineStart != null && _ItemsSource != null)

{

//Width of the event: (event-length / timeline-length) * width of root canvas

double w = (_ItemsSource.End - _ItemsSource.Start).TotalDays / (_TimeLineEnd.Value - _TimeLineStart.Value).TotalDays * RootCanvas.ActualWidth;

TimeLineBorder.Width = (w > 0) ? w : 0;
TimeLineBorder.Height = (RootCanvas.ActualHeight > 3) ? RootCanvas.ActualHeight - 3 : RootCanvas.ActualHeight;

RootCanvas.Background = _ItemsSource.BackGround;

Canvas.SetTop(TimeLineBorder, 1.5);

//place where event starts in the timeline: (event-start - timeline-start)/(timeline-end - event-start) * width of root canvas

double borderLeft = (_ItemsSource.Start - _TimeLineStart.Value).TotalDays / (_TimeLineEnd.Value - _TimeLineStart.Value).TotalDays * RootCanvas.ActualWidth;

Canvas.SetLeft(TimeLineBorder, borderLeft);


//line at bottom of timeline, to separate it from next one.

Canvas.SetTop(BottomBorderLine, RootCanvas.ActualHeight - 0.1);

BottomBorderLine.X2 = RootCanvas.ActualWidth;


//write out the label and tooltip

TimeLineTextBlock.Text = _ItemsSource.Label;

Canvas.SetTop(TimeLineTextBlock, 2);

double textBlockLeft = borderLeft + 4;

if (textBlockLeft < 0)

textBlockLeft = 2;

Canvas.SetLeft(TimeLineTextBlock, textBlockLeft);

textBlockLeft = borderLeft + 5;

if (textBlockLeft < 0)

textBlockLeft = 3;

ToolTipService.SetToolTip(TimeLineBorder, _ItemsSource.ToolTip);

ToolTipService.SetToolTip(TimeLineTextBlock, _ItemsSource.ToolTip);

RootCanvas.UpdateLayout();

}

}


Here is the method that perform the painful details of drawing the axis:

private void DrawAxis()

{

//Clear all existing elements in axis canvas

AxisCanvas.Children.Clear();

//number of days in the range. Includes partial days.

double numDays = (_endDate.Value - _startDate.Value).TotalDays;

double totalWidth = PlotCanvas.ActualWidth;

//Set the axis to span the whole plot canvas

AxisLine.X2 = totalWidth;

AxisCanvas.Children.Add(AxisLine);

//Get the Width of a day as represented in the axis. This value wil be used to compute

//the date/time info represented by a point on the plot canvas until the next time axis changes

_widthOfADay = totalWidth / numDays;

_mouseHighlight.Width = _widthOfADay;

_mouseHighlight.Height = PlotCanvas.Height;

Canvas.SetLeft(_mouseHighlight, 0 - _widthOfADay);

PlotCanvas.Children.Add(_mouseHighlight);

//The first day may be a partial day. If it is, account for this on the axis.

//axisOffset represents the part of the day before the axis starts

_axisOffset = (_startDate.Value.TimeOfDay - _startDate.Value.Date.TimeOfDay).TotalDays * _widthOfADay;

for (double i = 0; i <= numDays; i++)

{

//day we are dealing with

DateTime currentDate = _startDate.Value.AddDays(i);

//'left' is the point on the axis that represents the start of the day

double left = _widthOfADay * i - _axisOffset;

//draw the vertical hash on axis

var l = new Line { Y2 = 10, StrokeThickness = 0.1,

Stroke = new SolidColorBrush { Color = Colors.Black } };

Canvas.SetLeft( l, left);

Canvas.SetTop(l, 40);

AxisCanvas.Children.Add(l);

//Date and DayOfWeek are written on the axis if the width of a day is more than 20

if (_widthOfADay > 20)

{

//Write date on the axis, starting 3 units from center of the day width

var t = new TextBlock { Text = currentDate.Day.ToString(), FontSize = 9, FontWeight = FontWeights.Thin, Foreground = new SolidColorBrush { Color = Colors.Gray } };

Canvas.SetLeft(t, left + _widthOfADay / 2 - 3);

Canvas.SetTop(t, 30);

AxisCanvas.Children.Add(t);

//Write dayOfWeek on the axis, starting 3 units from center of the day width

var d = new TextBlock { Text = currentDate.DayOfWeek.ToString().Substring(0,3), FontSize = 9, FontWeight = FontWeights.Medium, Foreground = new SolidColorBrush{Color=Colors.LightGray } };

Canvas.SetLeft(d, left + _widthOfADay / 2 - 8);

Canvas.SetTop(d, 15);

AxisCanvas.Children.Add(d);

}

//if it is the first day of the month or the second day on the axis (because the first day may be

//a partial and hence we won't see the value), write the month on the axis

if (i == 1 || currentDate.Day == 1)

{

var tmonth
= new TextBlock { Text = Enum.GetName(typeof(Months), currentDate.Month - 1), FontSize = 10, FontWeight = FontWeights.Bold, Foreground = new SolidColorBrush { Color = Colors.Gray } };

if (currentDate.Month == 1)

tmonth.Text += " " + currentDate.Year;

Canvas.SetLeft(tmonth, left);

Canvas.SetTop(tmonth, 2);

AxisCanvas.Children.Add(tmonth);

}

//Draw the vertical gridline on the plot canvas for the start of the day.

DrawGridLine(left);

//If the day is today, do some special stuff

if (currentDate.Date == DateTime.Now.Date)

{

//color the day in plot canvas

ColorColumn(left, _widthOfADay, (Brush)Application.Current.Resources["TimeLineTodayColumn"]);

//Draw a colored rectangle on the axis that spans the entire day

var r = new Rectangle

{

Height
= AxisCanvas.ActualHeight,

Width = _widthOfADay,

Fill = new SolidColorBrush { Color = Colors.Gray },

Opacity = .1

}
;

Canvas.SetLeft(r, left);

ToolTipService.SetToolTip(r, "Today");

AxisCanvas.Children.Add(r);

}

//if it is weekend and not today, color it differently.

else if (currentDate.DayOfWeek == DayOfWeek.Sunday || currentDate.DayOfWeek == DayOfWeek.Saturday)

ColorColumn(left, _widthOfADay, (Brush)Application.Current.Resources["TimeLineWeekendColumn"]);

}

AxisCanvas.UpdateLayout
();

}


Selection / deselection are done by the TimeLine controls. Global deselection of timelines happens when user double-clicks outside a timeline. The timeline raises a GlobalDeselectRequested event, that gets handled by the visualizer. When a double-click happens inside a TimeLine, it raises an event, that causes the visualize to bundle up the datacontexts of all the selected timelines and pass them through in a DetailRequested event. This can be handled by the instatiating page, and do whatever it needs to do with the info.

Saturday, August 15, 2009

A Timeline Visualizer in Silverlight/C#: Part 1

I encountered a problem while developing an application for my current client: They needed to visualize a series of events on a timeline. Like a schedule or a Gantt chart. I couldn't find a canned solution for this, so I created one in Silverlight/C#. Ideally I want to create a templated control with declarative bindings, etc., but currently I just have it in the form of usercontrol. I figured it is still useful to share it here, since others will also have data that falls into this category, and could use ideas from this.

Here is a sample of how the control can be used. There is a bunch of UI functionality like click & drag, select/unselect item, mousewheel zoom in/zoom out, doubleclick to raise 'getdetail' event, add new item, etc. For some reason, Mousewheel works only in IE and not in Firefox. It works everywhere when you run it locally. I suspect the disparity is because of some site weirdness; I am using MS's free 10G silverlight streaming space to host the app. If anybody has any ideas, please let me know.
http://silverlight.services.live.com/invoke/105917/TimeLine%20Visualizer%20Demo/iframe.html


You can get the entire solution from filefactory: http://www.filefactory.com/file/ah13e8g/n/VisualTimelineDemo_zip.
Now, for the code. We will start looking at this from the outside in.
The relevant xaml in the page looks like this:

   <Grid x:Name="LayoutRoot">
<Grid.RowDefinitions>
<RowDefinition Height="Auto"/>
<RowDefinition Height="*"/>
<RowDefinition Height="Auto"/>
</Grid.RowDefinitions>
<Border BorderBrush="#99000000" BorderThickness="1" CornerRadius="4,4,0,0" Margin="2" Grid.Row="0">
<TextBlock TextWrapping="Wrap" Margin="4,0,2,0" Text="Click on an item to select, click again to deselect. Double-Click outside any item to deselect globally. Click and drag to move. Use Mousewheel to zoom in/out. Doubleclick to request details of selected timeline item(s)."/>
</Border>
<local:TimeLineVisualizer Name="tl" Grid.Row="1"/>
<Border BorderBrush="#99000000" BorderThickness="1" CornerRadius="0,0,4,4" Margin="2" Grid.Row="2">
<StackPanel Orientation="Horizontal" Margin="4">
<TextBlock Margin="4,0,2,0" Text="TimeLine Item Name:"/>
<TextBox Name="ItemNameTextBox" Width="100"/>
<TextBlock Margin="4,0,2,0" Text="Start:"/>
<basics:DatePicker Name="StartDatePicker"/>
<TextBlock Margin="4,0,2,0" Text="End:"/>
<basics:DatePicker Name="EndDatePicker"/>
<Button Margin="4,0,4,0" Name="Btn_InsertTimeLine" Content="Add Item to TimeLine" Click="Button_Click"/>
</StackPanel>
</Border>
</Grid>

Class Diagram for TimeLineVisualizer:
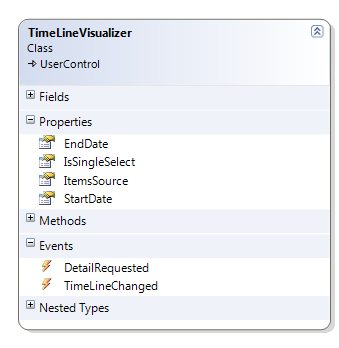
Here is the code-behind in the page that deals with TimeLineVisualizer events:

     public Home()
{
------
tl.TimeLineChanged += (s, e) => SetTimeLineItemSource();
tl.DetailRequested += new EventHandler<DetailRequestedEventArgs>(tl_DetailRequested);
}
void tl_DetailRequested(object sender, DetailRequestedEventArgs e)
{
MessageBox.Show("'DetailRequested' event raised by TimeLine");
}
void Home_Loaded(object sender, RoutedEventArgs e)
{
SetTimeLineItemSource();
}
private void SetTimeLineItemSource()
{
tl.ItemsSource = from t in DataAccess.TimeLines
where ExtensionMethods.Intersects(t.Start, t.End, tl.StartDate.Value, tl.EndDate.Value)
select t;
}
The “ExtensionMethods.Intersects” method justs tells you if 2 date ranges intersect:

     //not really an extension method
public static bool Intersects(DateTime r1Start, DateTime r1End, DateTime r2Start, DateTime r2End)
{
return (r1Start == r2Start) || (r1Start > r2Start ? r1Start <= r2End : r2Start <= r1End);
}
In the next entry, we will look at the TimeLineVisualizer usercontrol.